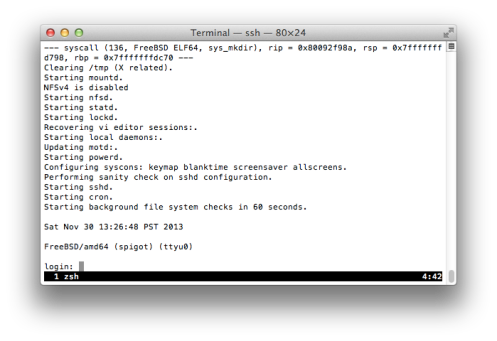
You may have heard about “cross building” an OS.
If not, the purpose of a “cross build” is to build an operating system image using another software or hardware platform.
For example, you might build NetBSD for ARM on your amd64 OS X machine.
FreeBSD has had many improvements in this area in the past few years.
To cross build for 32bit intel from 64bit amd the command line is very simple:
env TARGET=i386 make -j8 buildworld && \
  env TARGET=i386 make -j8 buildkernel
Now what we want to do is install this FROM my i386 machine using nfs. Why? Well during install FreeBSD sets certain special file attributes that I would like to preserve that I can not use via NFS.
Here’s how we do it:
# mount the amd64 source and obj trees via NFS:
mount spigot:/usr/trees /usr/trees
mount spigot:/usr/obj /usr/obj
# enter the source directory, note this MUST be in the same realpath(1)
# location as it is on the buildhost.
# This is why it's not just "/usr/src"
cd /usr/trees/freebsd.git
# install kernel:
env MAKEOBJDIRPREFIX=/usr/obj/i386.i386 CC=/usr/bin/cc \
  INSTALL=/usr/bin/install \
  make installkernel
# install world:
env MAKEOBJDIRPREFIX=/usr/obj/i386.i386 CC=/usr/bin/cc \
  INSTALL=/usr/bin/install STRIPBIN=/usr/bin/strip \
  MAKEWHATIS=/usr/bin/makewhatis \
  make installworld
This means I get to keep my fschg special files, and not a ton of time is taken with tarballs or other things that might blow up.
Is there a better way with tar or cpio? Should there be a tool/script added to base to cross-install?
First impressions are huge. A first impression can influence the entirety of an employee’s relationship with the company. Setting expectations for efficiency is why onboarding employees should go as smoothly and efficiently as possible.
A company whose onboarding process is slick, fast and on point goes a long way in setting expectations for new hires to get up to speed quickly and contribute in their very first days.
Those first few days sets the pace at which an employee will work. Any misstep during this crucial time period should be avoided if at all possible. If there is a misstep then it needs to be addressed as soon as possible to keep expectations set high on both sides of the employer and employee relationship. Personally I will take someone aside and acknowledge the issue and incorporate their feedback into the hiring process to improve it for later hires.
Hiring smoothly in a startup environment can becomes a huge challenge. Quite quickly institutional knowledge starts to pile up. Rapidly more and more systems need to be configured for new hires. Before the early team realizes it a new hire may need as many as twenty, if not more, individual things done to get them fully up to speed. Scheduling all of those pieces across multiple teams becomes a critical part of your onboarding success.
One of the fastest ways to turn institutional knowledge into process is to gather all the stakeholders and convert that knowledge into a workflow that is shared with the teams involved in the onboarding process. This can be done with a wiki, spreadsheet, or google doc.
The next step is moving that to a system where tickets are assigned to the parties responsible for the hiring process.
At Norse we are using Redmine for development tracking, developer operations, facilities and networking operations. It made sense to integrate our hiring process into Redmine in order to track all the moving pieces.
Integration into Redmine was made easy via the REST API that Redmine offers. A few hours of scripting while waiting for our product to build was enough to put together enough of a script to get all the major components of onboaring into redmine and assigned to the responsible parties.
The language chosen for this tool was Python and the basic philosophy behind this is that python is simple enough that a domain specific language for entering the tickets was not needed. Instead of spending a huge amount of time making a DSL or meta language for making ticket batches, it is sufficient to make a function that takes as inputs the responsible party, parent ticket, subject, body and deadline for each part and returns the identifier of the ticket created. As to why Python was chosen over Ruby (since Redmine is written in Ruby) is that we just have more people using Python in house than Ruby so it makes the maintenance of this script easier.
So where can the script be downloaded from? Github of course.
To get this up and running you’ll need to follow these steps:
Install Python’s “requests” module for the REST calls. On FreeBSD:
pkg install py-requests
Elsewhere:
pip install requests
Download the script and modules:
git clone https://github.com/alfredperlstein/redmine_tools.git
-or-
wget https://github.com/alfredperlstein/redmine_tools/archive/master.zip
unzip master.zip
Then edit the options to point it at your Redmine setup and options. The “redmine api key” or “–redmine-http-auth-pass” can be found in Redmine user “account->api key” (note you’ll want to fixup the “hxxp” to “http”, something about wordpress causes extra newlines to appear in preformatted text when it sees a url):
--hire-full-name
Alfred Perlstein
--hire-extern-email
alfred@.org
--redmine-api-url
hxxp://redmine.yourcompany.com
--redmine-hiring-manager
ap
--redmine-http-auth-user
0000your_redmine_api_key_here00000000000
--redmine-http-auth-pass
alfred
Hacking the script to match your onboarding workflow. The assignment of tickets and roles are all managed inside of onboard.py. The next steps explain how to customize onboard.py to your organization.
Our workflow in engineering is divided up between three teams of which each has a manager/director. Those three are, facilities/IT, network ops/devops, and engineering/devops. Each of those people are “hb”, “tgs” and “ap” in our Redmine instance. You’ll see those variables referenced as hil_account, tom_account, alfred_account in the code. You will probably want to make up the accounts and decide how to divvy up the work and the move on to the workflow part of the script. You probably have people with different names and probably different roles at your organization so figure that part out first.
The next step is to start to hack on the script itself to match your company’s workflow for onboarding. We have many moving parts and the script reflects that.
To begin that process you will want to scroll down to the section of onboard.py that looks like this:
issue_template = {
        "project_id" : proj_id,
        "assigned_to_id" : user_id,
        "tracker_id": support_id,
        "subject": "Onboarding %s" % new_user_name,
        "description": "This is the main ticket to onboard %s" % new_user_name,
        #parent_issue_id - ID of the parent issue
        "watcher_user_ids": watcher_ids,
        "due_date": due_date_str
}
This scection defines the “template” used for all of the following tickets. We modify this template in place as we go through the script setting it up for the next call to
rm.post_ticket()
. Keeping a global state is a decent tradeoff for keeping this script simple and easy to understand.
We then need to go down to where the script begins to post tickets to redmine:
print "Posting main issue:"
main_issue_id = rm.post_ticket(user=new_user_name,
        subject="Onboarding %s" % new_user_name,
        payload=payload,
        body="This is the main ticket to onboard %s" % new_user_name)

print "Posting sub issues..."

# set up the parent issue.
issue_template["parent_issue_id"] = main_issue_id

# Alfred Tickets
issue_template["assigned_to_id"] = rm.get_user_id_by_name(alfred_account)
rm.post_ticket(user=new_user_name, subject="get ssh pub key",
    payload=payload)
rm.post_ticket(user=new_user_name, subject="build1 login",
    payload=payload)
rm.post_ticket(user=new_user_name, subject="build1 add to 'dev' unix group",
    payload=payload)
To get started first change the parameter to
rm.get_user_id_by_name(alfred_account)
to whomever is responsible for the tickets that follow, and then start to customize the tickets appropriately.
Because redmine has the concept of blockers and sub-sub-tasks our of the box we are looking at making use of those features to set the dependency graph between each step properly, but until then a blast of tickets to the responsible parties seems good enough.
Enjoy and lastly from Norse I wanted to wish you all good luck with your new hires!
About a year ago I gave up trying to use virtualenv on FreeBSD due to missing sqlite libraries.
This was the error I was getting and also a similar one when trying django…
~/gitbridge/app % python db_repo/manage.py version_control sqlite:///db.db db_repo
Traceback (most recent call last):
 File "db_repo/manage.py", line 5, in <module>
 main(debug='False')
 File "/home/alfred/gitbridge/lib/python2.7/site-packages/migrate/versioning/shell.py", line 207, in main
 ret = command_func(**kwargs)
 File "<string>", line 2, in version_control
 File "/home/alfred/gitbridge/lib/python2.7/site-packages/migrate/versioning/util/__init__.py", line 155, in with_engine
 engine = construct_engine(url, **kw)
 File "/home/alfred/gitbridge/lib/python2.7/site-packages/migrate/versioning/util/__init__.py", line 140, in construct_engine
 return create_engine(engine, **kwargs)
 File "/home/alfred/gitbridge/lib/python2.7/site-packages/sqlalchemy/engine/__init__.py", line 344, in create_engine
 return strategy.create(*args, **kwargs)
 File "/home/alfred/gitbridge/lib/python2.7/site-packages/sqlalchemy/engine/strategies.py", line 73, in create
 dbapi = dialect_cls.dbapi(**dbapi_args)
 File "/home/alfred/gitbridge/lib/python2.7/site-packages/sqlalchemy/dialects/sqlite/pysqlite.py", line 297, in dbapi
 raise e
ImportError: No module named pysqlite2
However recently I happened to observe how the sqlite3 module is installed and I’ve been able to hack it into virtualenv.
The problem is somewhat due to FreeBSD ports compiling the minimum python needed in order to run.
So how do we fix this?
Well first we make sure we are in our virtualenv setup. We then steal the setup.py from the FreeBSD ports tree and hack it.
#!/usr/bin/env python
# To use:
#       python setup.py install
#

__version__ = "$FreeBSD: head/databases/py-sqlite3/files/setup.py 313167 2013-03-01 20:12:01Z lwhsu $"

try:
    import distutils
    from distutils import sysconfig
    from distutils.command.install import install
    from distutils.core import setup, Extension
except:
    raise SystemExit, "Distutils problem"

install.sub_commands = filter(lambda (cmd, avl): 'egg' not in cmd,
                              install.sub_commands)

prefix = sysconfig.PREFIX
inc_dirs = [prefix + "/include", "Modules/_sqlite"]
lib_dirs = [prefix + "/lib"]
libs = ["sqlite3"]
macros = [('MODULE_NAME', '"sqlite3"')]
sqlite_srcs = [
'_sqlite/cache.c',
'_sqlite/connection.c',
'_sqlite/cursor.c',
'_sqlite/microprotocols.c',
'_sqlite/module.c',
'_sqlite/prepare_protocol.c',
'_sqlite/row.c',
'_sqlite/statement.c',
'_sqlite/util.c']

try:
    import ctypes
    ctypes.CDLL('libsqlite3.so').sqlite3_load_extension
except AttributeError:
    macros.append(('SQLITE_OMIT_LOAD_EXTENSION', '1'))

setup(name = "_sqlite3",
      description = "SQLite 3 extension to Python",

      ext_modules = [Extension('_sqlite3', sqlite_srcs,
                               include_dirs = inc_dirs,
                               libraries = libs,
                               library_dirs = lib_dirs,
                               runtime_library_dirs = lib_dirs,
                               define_macros = macros)]
      )
All we need to do is slightly modify the include and libraries path like so:
First we copy it to our home directory:
% cp /usr/ports/databases/py-sqlite3/files/setup.py ~/
Then we edit it and change the “inc_dirs” and “lib_dirs” to work:
prefix = sysconfig.PREFIX
inc_dirs = ["/usr/local/include", prefix + "/include", "Modules/_sqlite"]
lib_dirs = ["/usr/local/lib", prefix + "/lib"]
libs = ["sqlite3"]
Then we extract a our system version of python and run our hacked setup.py script like so:
% tar xzvf /usr/ports/distfiles/python/Python-2.7.6.tar.xz
% cd Python-2.7.6/Modules
% python ~/setup.py install
running install
running build
running build_ext
building '_sqlite3' extension
cc -fno-strict-aliasing -O2 -pipe -fno-strict-aliasing -DNDEBUG -fPIC -DMODULE_NAME="sqlite3" -I/usr/local/include -I/home/alfred/gitbridge/include -IModules/_sqlite -I/usr/local/include/python2.7 -c _sqlite/cache.c -o build/temp.freebsd-11.0-CURRENT-amd64-2.7/_sqlite/cache.o
...
creating build/lib.freebsd-11.0-CURRENT-amd64-2.7
cc -shared -L/usr/local/lib -pthread build/temp.freebsd-11.0-CURRENT-amd64-2.7/_sqlite/cache.o build/temp.freebsd-11.0-CURRENT-amd64-2.7/_sqlite/connection.o build/temp.freebsd-11.0-CURRENT-amd64-2.7/_sqlite/cursor.o build/temp.freebsd-11.0-CURRENT-amd64-2.7/_sqlite/microprotocols.o build/temp.freebsd-11.0-CURRENT-amd64-2.7/_sqlite/module.o build/temp.freebsd-11.0-CURRENT-amd64-2.7/_sqlite/prepare_protocol.o build/temp.freebsd-11.0-CURRENT-amd64-2.7/_sqlite/row.o build/temp.freebsd-11.0-CURRENT-amd64-2.7/_sqlite/statement.o build/temp.freebsd-11.0-CURRENT-amd64-2.7/_sqlite/util.o -L/usr/local/lib -L/home/alfred/gitbridge/lib -Wl,-rpath=/usr/local/lib -Wl,-rpath=/home/alfred/gitbridge/lib -lsqlite3 -o build/lib.freebsd-11.0-CURRENT-amd64-2.7/_sqlite3.so
running install_lib
copying build/lib.freebsd-11.0-CURRENT-amd64-2.7/_sqlite3.so -> /home/alfred/gitbridge/lib/python2.7/site-packages
(gitbridge).(23:07:26)(alfred@freefall.freebsd.org)
~/gitbridge/app/derp/Python-2.7.6/Modules %
Now we should be able to run sqlalchemy or django or whatever under virtualenv!
~/gitbridge/app % python db_repo/manage.py version_control sqlite:///github.db db_repo
~/gitbridge/app %
Most excellent!
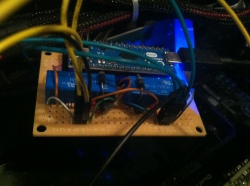
I realized a bit too late that the spiffy new desktop I bought to do FreeBSD development had a problem.
1) I had no means to remotely reboot the computer if the OS crashed hard.
2) If I were to go on a trip I had to leave the machine on all the time. At 60 watts idle, it isn’t cheap to leave it on at all times.
So how to solve this?
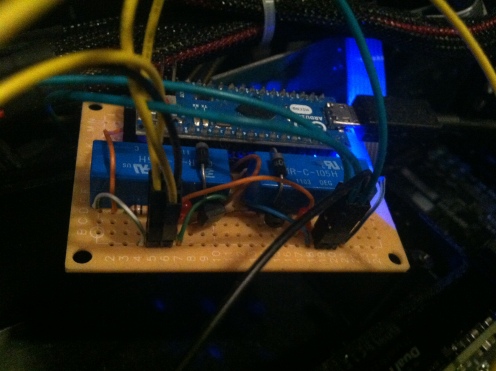
Well I just happened to pick up an Arduino Micro to play with and figured that I could use it to remote manage this PC with the Soekris net5501 I already have.
So first off, let’s design a board that can be used to power on/off the computer.
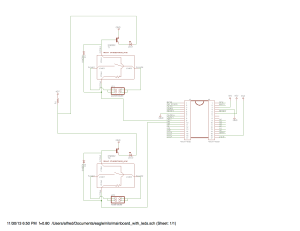
All we really need is the Arduino to control two relays. One relay will bridge the desktop’s motherboard power pins, the other will bridge the reset pins on the motherboard.
I did some prototyping on a breadboard I came up with a parts list:
- Arduino micro (1)
- Radio shack 5v reed relay 275-0232 (2)
- diodes 1N4004 (2)
- transistor 2n222 (2)
- leds (2)
- pin headers (8)
- 34 pin dip socket (2)
- female to female jumper wires (I suggest getting long ones, probably 300mm) (4)
- resistor for the leds (1)
- 15×25 perf board (1)
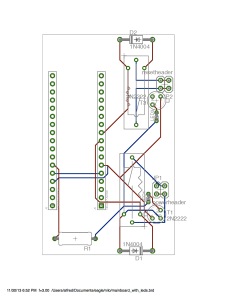
After doing a rough prototype I downloaded a copy of Eagle CAD from http://www.cadsoftusa.com/ to sketch out what my design would look like.
The sketch:
The actual layout:
I then wrote a sketch for the Arduino, see the end of the blog post for the source.
Then all you need to do is:
- Move the computer’s case power jumper wires to the board’s “power header” pins 1 and 2.
- Wire up the “power header” pins 3 and 4 to the motherboard.
- Move the computer’s case reset jumper wires to the board’s “reset header” pins 1 and 2.
- Wire up the “reset header” pins 3 and 4 to the motherboard.
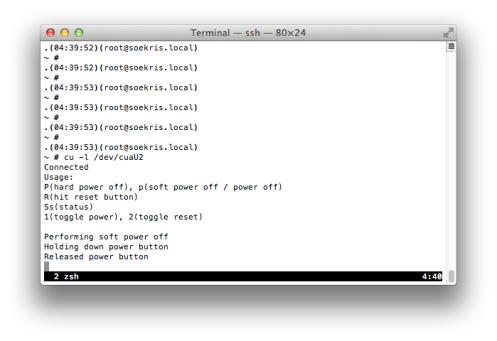
Then on my FreeBSD box I can do this:
And in another window the machine boots up over serial:
Now if I ever wedge the machine hard enough I can remote power it on/off by remotely holding down the power switch on the machine, hitting the reset button or hitting the power button.
If I were to add anything to this project, I would probably add the ability to detect if the motherboard is actually powered on or not. Any suggestions on how to do this? I’m guessing I can just wire the motherboard’s pins that power the LED to one of the input pins on the Arduino, then add a transistor to drive the case power LED when I detect voltage, a few modifications of the sketch and I can have it report power status by reading the power LED off the motherboard.
Here are the Eagle files in their entirety: http://mu.org/~bright/wordpress/2013_12_01_nilo/nilo.zip
Finally, here’s the code for the Arduino. (http://mu.org/~bright/wordpress/2013_12_01_nilo/nilo_sketch.ino) Enjoy!
/*-
 * Copyright (c) 2012 Alfred Perlstein <alfred@freebsd.org>
 * All rights reserved.
 *
 * Redistribution and use in source and binary forms, with or without
 * modification, are permitted provided that the following conditions
 * are met:
 * 1. Redistributions of source code must retain the above copyright
 *    notice, this list of conditions and the following disclaimer.
 * 2. Redistributions in binary form must reproduce the above copyright
 *    notice, this list of conditions and the following disclaimer in the
 *    documentation and/or other materials provided with the distribution.
 *
 * THIS SOFTWARE IS PROVIDED BY THE AUTHOR AND CONTRIBUTORS ``AS IS'' AND
 * ANY EXPRESS OR IMPLIED WARRANTIES, INCLUDING, BUT NOT LIMITED TO, THE
 * IMPLIED WARRANTIES OF MERCHANTABILITY AND FITNESS FOR A PARTICULAR PURPOSE
 * ARE DISCLAIMED.  IN NO EVENT SHALL THE AUTHOR OR CONTRIBUTORS BE LIABLE
 * FOR ANY DIRECT, INDIRECT, INCIDENTAL, SPECIAL, EXEMPLARY, OR CONSEQUENTIAL
 * DAMAGES (INCLUDING, BUT NOT LIMITED TO, PROCUREMENT OF SUBSTITUTE GOODS
 * OR SERVICES; LOSS OF USE, DATA, OR PROFITS; OR BUSINESS INTERRUPTION)
 * HOWEVER CAUSED AND ON ANY THEORY OF LIABILITY, WHETHER IN CONTRACT, STRICT
 * LIABILITY, OR TORT (INCLUDING NEGLIGENCE OR OTHERWISE) ARISING IN ANY WAY
 * OUT OF THE USE OF THIS SOFTWARE, EVEN IF ADVISED OF THE POSSIBILITY OF
 * SUCH DAMAGE.
 */

// Pin 13 has an LED connected on most Arduino boards.
// give it a name:
int onboardLed = 13;
int powerPin = 4;
int powerState = 0;

int resetPin = 3;
int resetState = 0;

// the setup routine runs once when you press reset:
void setup() {
  // initialize the digital pin as an output.
  pinMode(onboardLed, OUTPUT);
  pinMode(powerPin, OUTPUT);
  pinMode(resetPin, OUTPUT);
}

void
pushPower()
{
      Serial.println("Holding down power button");
      digitalWrite(powerPin, HIGH);
      powerState = 1;
}

void
releasePower()
{
      digitalWrite(powerPin, LOW);
      Serial.println("Released power button");
      powerState = 0;
}

void
pushReset()
{
      Serial.println("Holding down reset button");
      digitalWrite(resetPin, HIGH);
      resetState = 1;
}

void
releaseReset()
{
      digitalWrite(resetPin, LOW);
      Serial.println("Released reset button");
      resetState = 0;
}

void serialHelp()
{
        Serial.println("Usage: \r\n"
        "P(hard power off), p(soft power off / power off)\r\n"
        "R(hit reset button)\r\n"
        "Ss(status)\r\n"
        "1(toggle power), 2(toggle reset)\r\n"
        );

}

// the loop routine runs over and over again forever:
void loop() {

top:
  if (Serial.available() > 0) {
    int incomingByte;
    // read the incoming byte:
    incomingByte = Serial.read();

//    Serial.print("Processing byte..  value: ");
//    Serial.println(incomingByte);

    switch (incomingByte) {
      case '1':
      if (powerState)
        releasePower();
      else
        pushPower();
      break;
      case '2':
      if (resetState)
        releaseReset();
      else
        pushReset();
      break;
      case 'P':
      if (powerState) {
            Serial.println("Button is already pushed, use 1 to toggle");
            serialHelp();
            break;
      }
      Serial.println("Performing hard power off");
      pushPower();
      delay(8000);
      releasePower();
      break;
      case 'p':
      if (powerState) {
            Serial.println("Button is already pushed, use 1 to toggle");
            serialHelp();
            break;
      }
      Serial.println("Performing soft power off");
      pushPower();
      delay(250);
      releasePower();
      break;
      case 'R':
      if (resetState) {
            Serial.println("Button is already pushed, use 2 to toggle");
            serialHelp();
            break;
      }
      Serial.println("Performing reset");
      pushReset();
      delay(250);
      releaseReset();
      break;
      case 's':
      case 'S':
      Serial.print("Status: power:");
      Serial.print(powerState);
      Serial.print(", reset:");
      Serial.println(resetState);
      break;
      default:
      serialHelp();
    }
    delay(10);
  }
}
The FreeNAS project is composed several git repositories of which two are forks from the FreeBSD project. The two forks we have are “FreeBSD source” and “FreeBSD ports”.
We keep forks to insulate ourselves from changes and allow for customization. Generally all the work we do is upstreamed into the respective projects, however since we have forked we tend to cherry-pick those changes back into our forks until we decide to migrate wholesale to a newer point in the FreeBSD tree.
Basically we want to grab a point in FreeBSD’s history, validate, test, build, etc and stick with it for some time and only pull the essentials back into our branches.
So let’s talk about how to cherry pick those changes.
Start with a clone of whichever FreeBSD repository you are using:
% git clone https://github.com/freebsd/freebsd
% cd freebsd
Now add the remote svn data so you can see svn versions of FreeBSD when doing git log:
git config --add core.notesRef refs/notes/origin/commits
git config --add remote.origin.fetch '+refs/notes/*:refs/notes/origin/*'
git fetch #
Now add freenas as a remote:
% git remote add trueos https://github.com/alfredperlstein/trueos
Fetch the data in your FreeNAS repo:
% git fetch trueos
From github.com:alfredperlstein/trueos
* [new branch] feature/unified_freebsd -> trueos/feature/unified_freebsd
* [new branch] freenas-9-stable -> trueos/freenas-9-stable
* [new branch] freenas-9.1-releng -> trueos/freenas-9.1-releng
* [new branch] pcbsd-9-stable -> trueos/pcbsd-9-stable
Checkout the branch you want to work on ‘feature/unified_freebsd’ into local branch ‘local_unified_freebsd’:
% git checkout -tb local_unified_freebsd trueos/feature/unified_freebsd
Now find your change by using git log against FreeBSD:
% git log origin/master # we're going log against FreeBSD head
...
commit e41d2fd565cf8d3945a0bbfc72489332deb7ae0d
Author: jimharris
Date: Tue Nov 12 21:14:19 2013 +0000
Check for special status code from FIRMWARE_ACTIVATE command
signifying that a reboot is required to complete activation
of the requested firmware image.
Reported by: Joe Golio
Sponsored by: Intel
MFC after: 3 days
Notes (origin/commits):
svn path=/head/; revision=258071
…
Note the hash for the commit, e41d2fd then git cherry pick it into your branch:
% git cherry-pick -x e41d2fd
[local_unified_freebsd 36e27b8] Check for special status code from FIRMWARE_ACTIVATE command signifying that a reboot is required to complete activation of the requested firmware image.
Author: jimharris <jimharris@FreeBSD.org>
1 file changed, 24 insertions(+), 11 deletions(-)
%
Then push your changes:
% git push -n trueos local_unified_freebsd:feature/unified_freebsd
And you’re done.
For working on ports, substitute the initial checkout:
% git clone https://github.com/freebsd/freebsd-ports.git
% cd freebsd-ports
Note, you CAN use a local git mirror of course, pulling from github is slow, so if you have a local up to date mirror then just clone from that instead, it should make no difference:
% git clone https://my.local.gitserver/git/freebsd/freebsd-ports.git
% cd freebsd-ports
Enjoy!
In my previous post I wrote about Gathering crash telemetry in an open source project. Now that the data is gathered it’s time to process it and present it to the team in a form that’s easy to digest.
It’s one thing to present the data into a banal search interface, search by date, search by crash signature, search by host id, search by crash… this is all pretty straightforward, however what brings value is collating the data in a form that brings attention to the crashes affecting many users, or a small group of users quite often.
What we basically want is “show me the crashes affecting the most users”.
My brain has been wired to do SQL for almost 20 years now. ORM is something new to me. So although django offers an easy escape to raw SQL I wanted to challenge myself by doing it the “orm way”.
So let’s take that query I came up with in SQL. Now I am a bit rusty, but given about 10 minutes I had this:
SELECT
  count(stack_squished_hash),
  count(distinct(hostid)),
  stack_squished_hash
FROM uploader_crashanalysis
GROUP BY stack_squished_hash
ORDER BY count(stack_squished_hash) desc
LIMIT 10;
Results:
163|134|8b78a8a0ad65a0d098fefe166ab979db14aa68d1ce0341c507cdbacae9c8eb55
68|62|578ff4df873f068e6fcfe0ff63382f41637268ea21485200e5703465e0268e44
59|48|d77edb98d20d6fbcca58ffda29d10aff011285f379ee45ad02fe26c68d29972c
14|10|1d43fa78165bc988c66a1b1c3432e321cb3d9635428df06b11747aa062da5ea0
13|11|8c750d734c4bcb00e3f7295fdc1dfc5d8ae7e9a2bb7ff60049ff9453e7324ffb
10|8|22ee7123a2e3eedbcdb99cff515ea1c364420ab82c5888167a946cb94803f6d1
8|6|d3fd8982a2d29fc8221329350735a9213f3bae9b843bb9734d085d9c4076b205
8|7|f9ca5c2dd3f874aa474139cb08b178f307e224387f3732cb9d16906a7678ed0b
7|4|64ea265507c9eb9a1d602237cc67736cb5abee3699f13c9e4323e878fb3583ed
7|7|abc0049c98e5b215563133d511690e246c75a2aa1e624514a6f6ad00541c65eb
Excellent!
Ok, now let’s get this into ORM. I tend to wimp out and use the fact that query sets are only run when on demand to build them up in steps.
# easy enough, filter by date...
g1 = CrashAnalysis.objects.filter(
    received_at__gte=start_date,
    received_at__lte=end_date,
    )

# ok we ONLY want the hostid first for our next aggregation.
g1 = g1.values('stack_squished_hash', 'hostid')

# now we want the SUM of unique hosts for each crash
g1 = g1.annotate(host_count=Count('hostid', distinct=True))

# total crashes.
g1 = g1.annotate(stack_count=Count('stack_squished_hash')).order_by()

# ok now select the final values:
#    host_count  - (unique hosts affected by this crash),
#    stack_count - (total crashes),
#    stack_squished_hash - (hash of the crash)
g1 = g1.values('host_count', 'stack_count', 'stack_squished_hash').order_by('-host_count')
After running this I keep seeing way too many rows, my nice little SQL works, but the ORM is doing something different:
>>> for g in g1[0:10]: print "%s - %s" % (g['host_count'],g['stack_count'])
...
1 - 1
1 - 1
1 - 1
1 - 1
1 - 1
1 - 2
1 - 1
1 - 1
1 - 1
1 - 1
It looks like it’s doing something very wrong.
If you’re an SQL user like I am then the next thing you do is emit the queryset’s SQL so you can get an idea of what it
may be doing right/wrong.
>>> print g1.query.__str__();
SELECT "uploader_crashanalysis"."stack_squished_hash", COUNT(DISTINCT "uploader_crashanalysis"."hostid") AS "host_count", COUNT("uploader_crashanalysis"."stack_squished_hash") AS "stack_count" FROM "uploader_crashanalysis" GROUP BY "uploader_crashanalysis"."stack_squished_hash", "uploader_crashanalysis"."hostid" ORDER BY "host_count" DESC
>>>
That looks almost right… let’s format that:
SELECT
  "uploader_crashanalysis"."stack_squished_hash",
  COUNT(DISTINCT "uploader_crashanalysis"."hostid") AS "host_count",
  COUNT("uploader_crashanalysis"."stack_squished_hash") AS "stack_count"
FROM "uploader_crashanalysis"
GROUP BY
  "uploader_crashanalysis"."stack_squished_hash",
  "uploader_crashanalysis"."hostid"    #  <- this is NO BUENO!
ORDER BY "host_count" DESC
Oh wait.. why is there that extra GROUP BY clause .. why is the ORM grouping by “hostid”? That will surely defeat the distinct query.
After trying random things from the docs and from google searches for about an hour I was almost ready to give up and just go to RAW SQL. Either I was depending on a non-standard SQL feature, or I was just lucky that my SQL query worked. Why is “hostid” being put into the GROUP BY clause?
# easy enough, filter by date...
g1 = CrashAnalysis.objects.filter(
    received_at__gte=start_date,
    received_at__lte=end_date,
    )

# ok we ONLY want the hostid first for our next aggregation.
g1 = g1.values('stack_squished_hash', 'hostid')    # <- **HERE**

# now we want the SUM of unique hosts for each crash
g1 = g1.annotate(host_count=Count('hostid', distinct=True))  # <- ** AND HERE**

# total crashes.
g1 = g1.annotate(stack_count=Count('stack_squished_hash')).order_by()

# ok now select the final values:
#    host_count  - (unique hosts affected by this crash),
#    stack_count - (total crashes),
#    stack_squished_hash - (hash of the crash)
g1 = g1.values('host_count', 'stack_count', 'stack_squished_hash').order_by('-host_count')
Oh wait a second… We are pulling in hostid so that we can do the annotation (djangoese for GROUP BY) but then after that we don’t need it any longer. Just maybe we can ditch it?
Let’s try this:
g1 = CrashAnalysis.objects.filter(
	    received_at__gte=start_date,
	    received_at__lte=end_date,
	    )

# Now we form the more complex group by using orm gymnastics:
#   tutorial here: http://www.youtube.com/watch?v=CmkYRKD9COs
# query we want (sort of)
# SELECT "uploader_crashanalysis"."stack_squished_hash",
# COUNT(DISTINCT "uploader_crashanalysis"."hostid") AS "host_count",
# COUNT("uploader_crashanalysis"."stack_squished_hash") AS "stack_count"
# FROM "uploader_crashanalysis"
# GROUP BY "uploader_crashanalysis"."stack_squished_hash" ORDER BY "host_count" DESC

# ok we ONLY want the hostid first for our next aggregation.
g1 = g1.values('stack_squished_hash', 'hostid')
g1 = g1.annotate(host_count=Count('hostid', distinct=True))

# IMPORTANT: use 'values()' to strip the hostid otherwise we'll get an additional 'group by'
# in the SQL.
# now that we have the aggregation on 'host_id' we need to remove 'host_id'
# from the values otherwise we'll get an extra "group by 'hostid'!!
g1 = g1.values('stack_squished_hash', 'host_count')
# ok now we can group by squished stack.
g1 = g1.annotate(stack_count=Count('stack_squished_hash')).order_by()
g1 = g1.values('host_count', 'stack_count', 'stack_squished_hash').order_by('-host_count')
Results in:
>>> print g1.query.__str__();
SELECT "uploader_crashanalysis"."stack_squished_hash", COUNT(DISTINCT "uploader_crashanalysis"."hostid") AS "host_count", COUNT("uploader_crashanalysis"."stack_squished_hash") AS "stack_count" FROM "uploader_crashanalysis" GROUP BY "uploader_crashanalysis"."stack_squished_hash" ORDER BY "host_count" DESC
>>>
Yes!
And…
>>> for g in g1[0:10]: print "%s - %s" % (g['host_count'],g['stack_count'])
...
134 - 163
62 - 68
48 - 59
11 - 13
10 - 14
8 - 10
7 - 7
7 - 7
7 - 8
6 - 8
>>>
Ok, pretty awesome.
Would I spend this much time mastering the ORM again and not using raw SQL? I’m not sure, but I think I now have a better understanding of the way things work and I hope you do as well.
As part of the FreeNAS project we have started to collect crash data to improve the product by fixing the bugs we find and sending the ones we can not seem to figure out back to the FreeBSD mothership.
Right now the data we are collecting is only the stack trace and panic reason we get from a kernel crash. Pretty minimal stuff, but immensely helpful. Here is an example:
Download ixdiagnose file: 00000000-0000-0000-0000-0019dbd0ec65 2013-10-16 18:50:51.943355+00:00 amd64
Date: Oct. 18, 2013, 3:42 p.m.
Hostid: 00000000-0000-0000-0000-0019dbd0ec65
Stack: hash: 5f33c8949b06755700da5fab3513ba34011e7dff4357372447205510e934c207
db:0:kdb.enter.default> bt
Tracing pid 11 tid 100003 td 0xfffffe000280e490
swinact() at swinact/frame 0xffffff800024bae0
mi_switch() at mi_switch+0x194/frame 0xffffff800024bb30
critical_exit() at critical_exit+0xa5/frame 0xffffff800024bb50
sched_idletd() at sched_idletd+0x11a/frame 0xffffff800024bbe0
fork_exit() at fork_exit+0x11f/frame 0xffffff800024bc30
fork_trampoline() at fork_trampoline+0xe/frame 0xffffff800024bc30
--- trap 0, rip = 0, rsp = 0xffffff800024bcf0, rbp = 0 ---
db:0:kdb.enter.default> ps

Reason: hash: 6b7f451cfeb38dbd4e60dcffb7919ee2d1e0df3aa8c67f9c0bc4efba146105bf
Fatal trap 9: general protection fault while in kernel mode
cpuid = 0; apic id = 00
instruction pointer = 0x20:0xffffffff80b2fc5b
stack pointer = 0x28:0xffffff800024ba70
frame pointer = 0x28:0xffffff800024bae0
code segment = base 0x0, limit 0xfffff, type 0x1b
 = DPL 0, pres 1, long 1, def32 0, gran 1
processor eflags = resume, IOPL = 0
current process = 11 (idle: cpu0)
For the uninitiated this data is meaningless as it is only a combination of symbols already in the FreeBSD kernel and the value of the instruction pointer. Basically it’s “where was the system when it crashed?” Nothing more, nothing less.
It seems not so exiting but for a telemetry and debugging geek like myself this is REALLY COOL!!! We can now aggregate this data and see if any of our users are having system instability and get the team focused on the bugs that are impacting the most users. In addition due to the reporting we can see if a single system is blowing up due to possibly bad hardware.
Ok. So we have this information, what’s next? Well we need to display it to our team of kernel engineers in a form that gathers attention and can be parsed easily.
With the advent of DVCS and the adoption of the DVCS “git” by the FreeBSD community it is now inexpensive to base your commercial project on FreeBSD and stay up to date.
The problem many people have faced is that they usually do not have the time nor expertise to manage “vendor imports” of a large project like FreeBSD. The majority of companies have time/budget to hire a handful of competent developers and until the advent of DVCS it was extremely time consuming to set up any sort of system to track a large open source project such as FreeBSD.
This blog post details recent work I’ve done to bring a product under Git version control and thereby make it extremely easy for us to track FreeBSD changes while also maintaining our project’s history.
While most DVCS articles focus on upstreaming changes and typically only shows the workflow for a single developer, this article will instead focus on maintaining your private changes for the long term as well as creating long term branches for your team to develop against.
Getting started.
Install git one of these ways:
- pkg install devel/git
- pkg_add -r git
- cd /usr/ports/devel/git && make all install
Setting up a mirror of FreeBSD’s git repository.
/ % mkdir ~/blog
/ % cd ~blog
# this next step takes about 30 minutes to run on my fast computer with fast networking
~/blog % git clone https://github.com/freebsd/freebsd.git
# move this clone to the side, it has the correct remote references, but is not a "bare" repo which is needed
# for a centralized repo that will be shared with a team
~/blog % mv freebsd badclone
# now make the actual bare repo
~/blog % git clone --bare --shared badclone freebsd.git
This will take a while. Expect an hour or so.
Now we need to update the git config file for your bare repo to point to the remote repo.
edit the following file:
~/blog % vi ~/blog/freebsd.git/config
Change the section under [remote “origin”] from:
[core]
        repositoryformatversion = 0
        filemode = true
        bare = true
[remote "origin"]
        url = /home/alfred/blog/badclone
to:
[core]
        repositoryformatversion = 0
        filemode = true
        bare = true
[remote "origin"]
        url = https://github.com/freebsd/freebsd.git
        fetch = +refs/heads/*:refs/remotes/origin/*
Now get that branch we’re going to base our work on:
~/blog % cd freebsd.git
# this command will take a few minutes
~/blog/freebsd.git % git fetch
~/blog/freebsd.git % git fetch
From https://github.com/freebsd/freebsd
 * [new branch]      master     -> origin/master
 * [new branch]      projects/altix -> origin/projects/altix
 * [new branch]      projects/altix2 -> origin/projects/altix2
 * [new branch]      projects/amd64_xen_pv -> origin/projects/amd64_xen_pv
 * [new branch]      projects/arm_eabi -> origin/projects/arm_eabi
 * [new branch]      projects/armv6 -> origin/projects/armv6
 * [new branch]      projects/arpv2_merge_1 -> origin/projects/arpv2_merge_1
...[snip]...
 * [new branch]      projects/geom_raid5 -> origin/projects/geom_raid5
 * [new branch]      projects/graid/7 -> origin/projects/graid/7
 * [new branch]      projects/graid/8 -> origin/projects/graid/8
 * [new branch]      projects/graid/head -> origin/projects/graid/head
 * [new branch]      projects/gvinum -> origin/projects/gvinum
...[snip]...
 * [new branch]      release/4.1.0 -> origin/release/4.1.0
 * [new branch]      release/4.1.1 -> origin/release/4.1.1
 * [new branch]      release/4.10.0 -> origin/release/4.10.0
 ...[snip]...
 * [new branch]      releng/8.3 -> origin/releng/8.3
 * [new branch]      releng/9.0 -> origin/releng/9.0
 * [new branch]      releng/9.1 -> origin/releng/9.1
 * [new branch]      stable/2.0.5 -> origin/stable/2.0.5
 * [new branch]      stable/2.1 -> origin/stable/2.1
 * [new branch]      stable/2.2 -> origin/stable/2.2
 * [new branch]      stable/3   -> origin/stable/3
 * [new branch]      stable/4   -> origin/stable/4
 * [new branch]      stable/5   -> origin/stable/5
 * [new branch]      stable/6   -> origin/stable/6
 * [new branch]      stable/7   -> origin/stable/7
 * [new branch]      stable/8   -> origin/stable/8
 * [new branch]      stable/9   -> origin/stable/9
 * [new branch]      svn_head   -> origin/svn_head
...[snip]...
 * [new branch]      user/alfred/9-alfred -> origin/user/alfred/9-alfred
 * [new branch]      user/alfred/so_discard -> origin/user/alfred/so_discard
~blog/freebsd.git % git branch --track releng/9.0 origin/releng/9.0
~blog/freebsd.git % git fetch origin releng/9.0
# we're now done with "badclone" so kill it.
~blog/freebsd.git % rm -rf ~/blog/badclone
Now make a working clone to branch for our project:
We are going to make a branch called “myproject-9.0” that is based off of the “releng/9.0” FreeBSD branch.
We make a private clone and then create the branches we need.
~blog/freebsd.git % cd ~/blog
# make a private clone
~/blog % git clone -b releng/9.0 ~/blog/freebsd.git myproject
~/blog % cd myproject
~/blog/myproject % git branch
* releng/9.0
# make our branch
~/blog/myproject % git checkout -b myproject-9.0 releng/9.0
Switched to a new branch 'myproject-9.0'
# share this branch in the repository in /git-repo/freebsd.git
~/blog/myproject % git push origin myproject-9.0
You should now be able to “git clone -b myproject-9.0 /git-repo/freebsd.git” directly from our “bare” repo! This is just testing that so far we’ve done everything right.
~/blog % git clone -b myproject-9.0 ~/blog/freebsd.git ~/blog/myproject-9.0
Cloning into '/home/alfred/blog/myproject-9.0'...
done.
Checking out files: 100% (49061/49061), done.
~/blog % rm -rf ~/blog/myproject-9.0

So now what?
Well your team goes off to work on the myproject-9.0 branch from /git-repo/freebsd-git.
A few months go by and now you want to migrate your project to FreeBSD 9.1.
How do we do this?
We create a copy branch and then rebase it onto FreeBSD 9.1.
First we set our main repo to track the new 9.1 branch:
% cd ~/blog/freebsd.git
~/blog/freebsd.git % git fetch
~/blog/freebsd.git % git fetch origin releng/9.1
From https://github.com/freebsd/freebsd
 * branch            releng/9.1 -> FETCH_HEAD
~/blog/freebsd.git % git branch --track releng/9.1 origin/releng/9.1
Branch releng/9.1 set up to track remote branch releng/9.1 from origin.
Now we can go into our private repo, create a “copy branch” then rebase it onto FreeBSD 9.1:
% cd ~/blog/myproject
# mirror FreeBSD 9.1
~/blog/myproject % git fetch
From /home/alfred/blog/freebsd
 * [new branch]      releng/9.1 -> origin/releng/9.1
~/blog/myproject % git checkout releng/9.1
Checking out files: 100% (10203/10203), done.
Branch releng/9.1 set up to track remote branch releng/9.1 from origin.
Switched to a new branch 'releng/9.1'
# copy my project branch, note after this command, both myproject-9.1 and myproject-9.0 are based on 9.0
~/blog/myproject % git checkout -b myproject-9.1 myproject-9.0
# now rebase this new branch (myproject-9.1) onto FreeBSD 9.1
~/blog/myproject % git rebase --onto releng/9.1 remotes/origin/releng/9.0 myproject-9.1
This will put you into a git rebase.
Once you are complete with your rebase your project branch ‘myproject-9.1’ should be based on FreeBSD 9.1.
I strongly suggest you use a visual tool such as “gitk” to check your work, go through each diff and watch for nasty stuff.
you should then push it to your shared repo:
git push -f origin myproject-9.1
Enjoy!
Soon I will cover tracking a moving target such as FreeBSD 9-stable.
This is a place where I will blog on technology and tools I use.
My goal is to share with the intent of educating as well as being educated by the community.
What you’ll find here are tips and tricks for making your life easier as a developer.
